This post is the last post of 2015, it’s also the biggest post to date on this blog, how fitting for it to come out on New Years Eve…
I’ve recently had a lot of people ask me the best ways for them to implement SAPE into their SEO strategies, and seeing as SAPE is such a powerful tool when used properly, I figured it would be useful to create an in depth introductory guide to buying SAPE links…
This post’s intro is mainly text, so stick with the text walls and you’ll soon be learning how to use one of the most powerful link networks (if not the most powerful) on earth.
Table of Contents
So, without further ado… Let’s get into it.
What is SAPE?
To start things off, I’ll briefly explain what SAPE is and how people use it before we get into actually using the site. For those who aren’t familiar with the platform, SAPE is a Russian link network that allows you to essentially purchase ridiculously authoritative, aged links at a very small monthly cost, and as you can imagine this can produce some fantastic ranking results and can quickly become an incredibly profitable asset to your business.
The way it works is that webmasters, hosts, hackers and pretty much anyone with access to aged websites will add link injection scripts to their site which will then add the site to the SAPE network. Where you can buy access to these links, no they aren’t contextual, and no… They definitely aren’t white hat.
The links are normally found in:
- The footer
- The sidebar
- Injected into the context
- Injected into the top of the site
- Fake Ads
The advantages of SAPE stretch further than the fact that there are hundreds of thousands of high authority backlinks at your disposal, as in the process of purchasing these links you’re leaving virtually no footprint behind. Not only that, SAPE’s sheer extent of available links (A network with over 700,000 sites!) gives users the ability to filter the search to specify the links niche, URL extension, PageRank, number of backlinks on that page, you get the idea. The list goes on and on, and the best to way to get good links with SAPE is the filtering process, which I’ll cover later on in this post.
Setting up SAPE
So now that we have an idea of what SAPE is and the power it holds, let’s get in to actually using the site. As I mentioned previously, SAPE is a Russian network, so unless you understand how to read Cyrillic Russian you’ll have a difficult time navigating the site. Not to worry though, this is where the Google Translate extension comes in handy.
The Google Translate extension pretty much does what it says on the tin and allows you to translate each page into clear English, which is an absolute lifesaver when using SAPE. Yes it’s a little bit frustrating at first having to translate every single page when using SAPE, but you do get used to it in time.
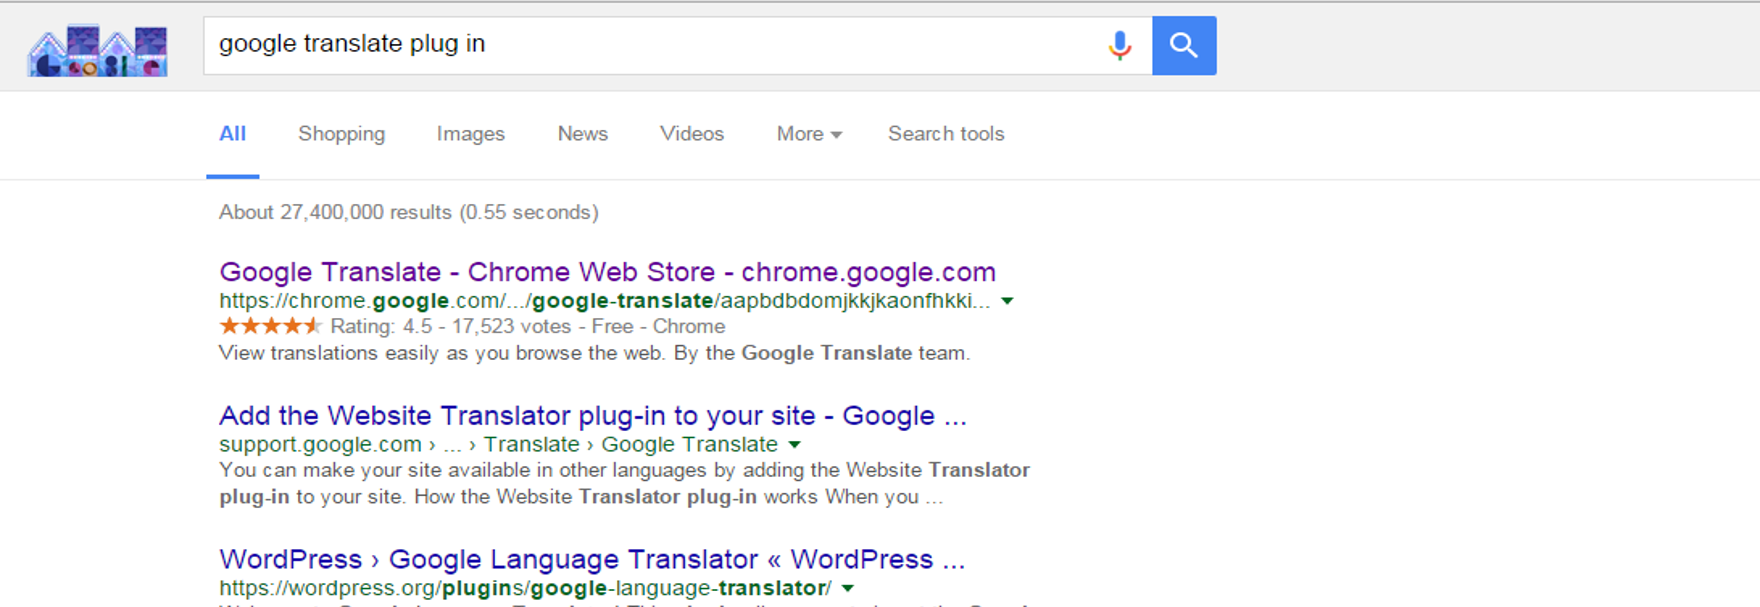
To download the plug in, firstly make sure you are using the Google Chrome browser, and then simply head over to google and search “Google Translate Plug In”. The one you want to download is the one that appears top.
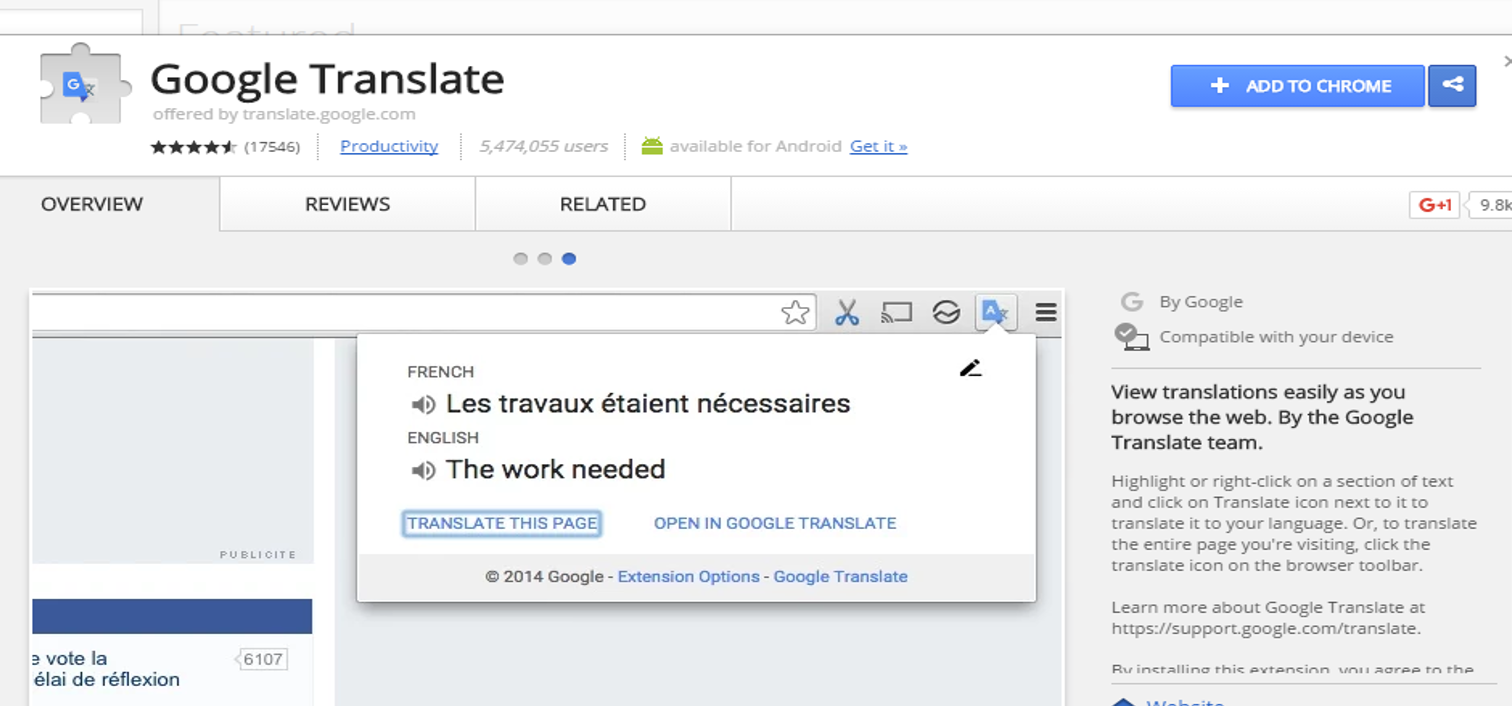
Once you’ve clicked it, simply press “add to chrome” in the top right hand corner and select ‘add extension’
The plugin will then be added to the sidebar, and it’s ready to use for SAPE.
Now you’re ready to head over to sape.ru.
Once you’re there, click on your new Google Translate plugin icon in the top right hand corner and press’ translate this page’.
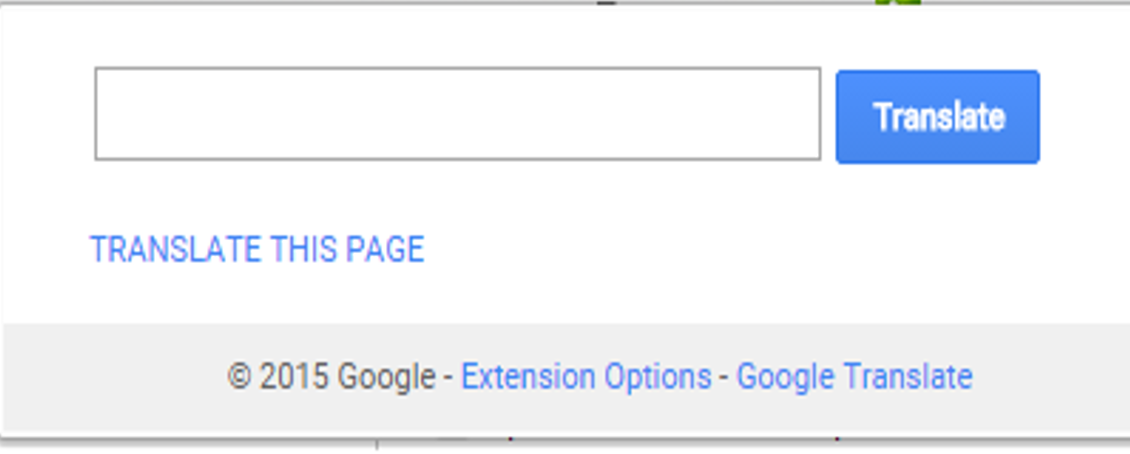
The page should then read in clear English.
The next step is to set yourself up with a SAPE account. It’s completely free to register but you will have to deposit some money into your account in order to purchase links (I will run through how to do this later in the guide). For now though, hit ‘register’ at the top right hand side of the screen and then translate the next page that appears.
Your screen should then look something like this –
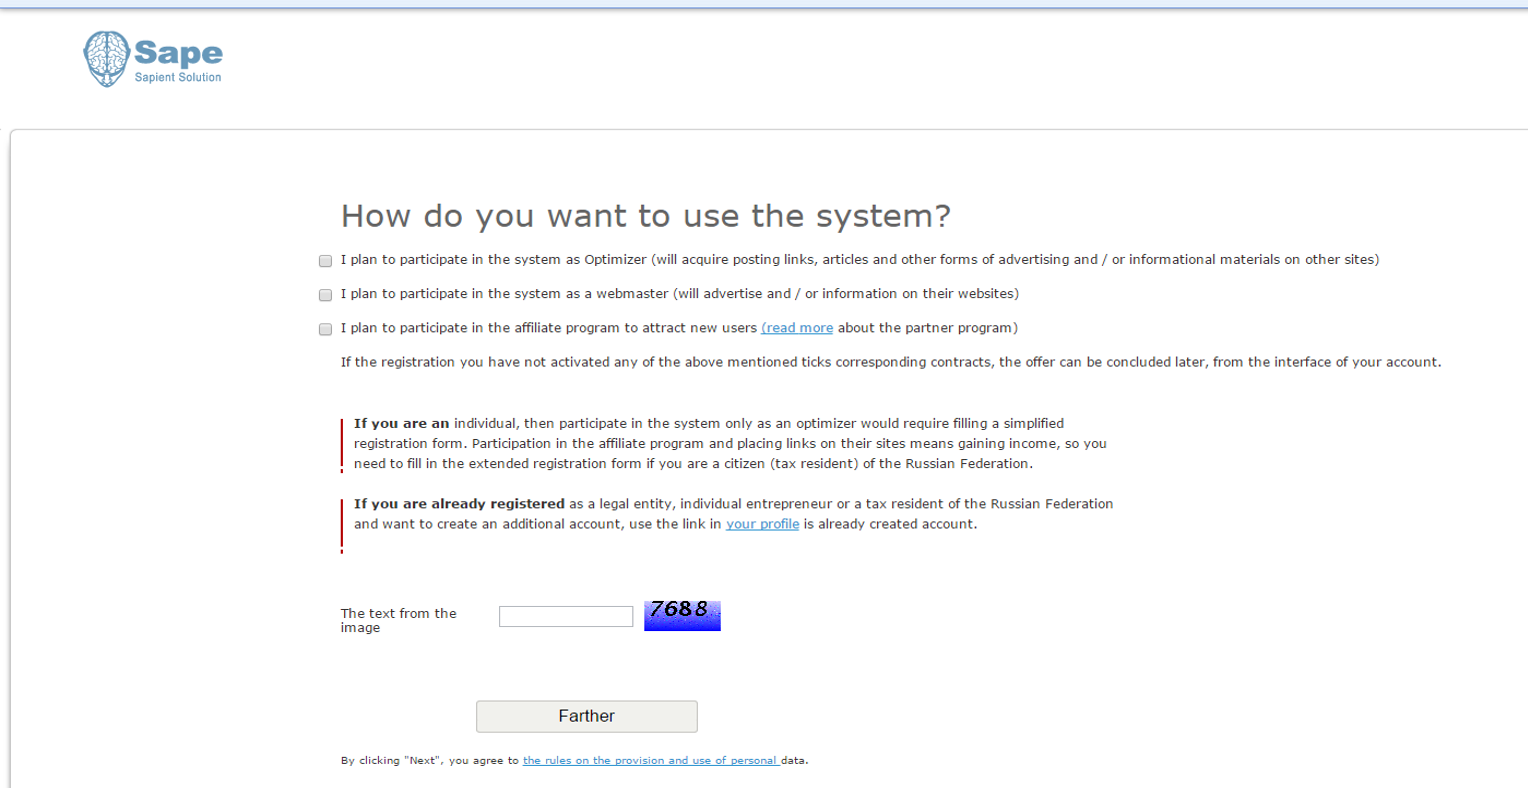
When this screen appears, make sure to select ‘I plan to participate in the system as Optimizer’ as this will allow you to purchase links from the site. Once that’s done just fill out the captcha at the bottom and select ‘farther’ (yep, sometimes the translations are great).
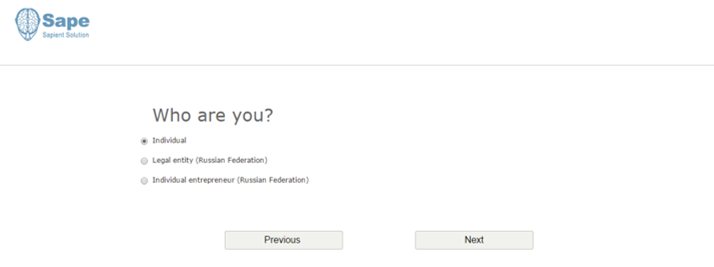
You’ll then be taken through to a new page. Again, just translate each page by selecting the Google Translate icon and press ‘translate this page’.
Once translated, just select ‘Individual’ and hit next –
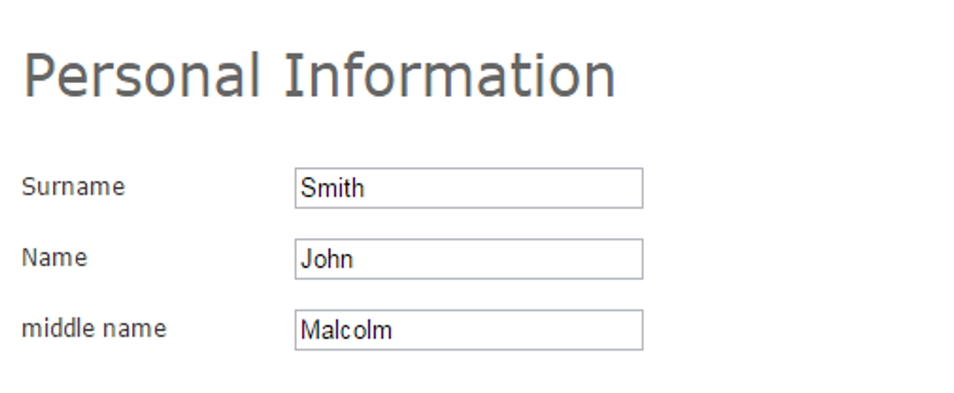
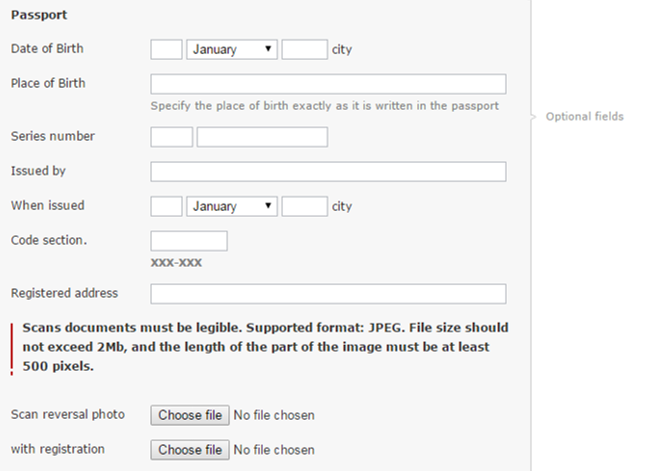
The next step after that is fairly self-explanatory, just enter in your first name, middle name and last name into the appropriate boxes. You don’t have to worry about using any fake name generators for this, but I’ve just used a random name as an example –
After that you’ll notice a big section for your passport details. Don’t worry about any of this as this is an optional field, so leave all of that section blank and hit next.
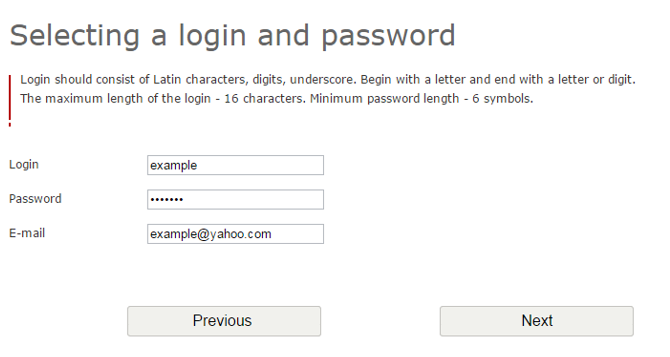
Once you’re on to the next page and translated it, you’ll see three fields for login, password and email. Make the login and password whatever you want it to be, but I advise you to not use a Gmail for this, just go with a nice Hotmail, or better yet… Host one yourself –
When that’s done and you’ve pressed next, you’ll get a huge Russian agency agreement message that even when translated, stays Russian as it’s an iframe. For this step all you have to do is select ‘I agree the terms of contract’ box in the bottom left and move on to the next step –

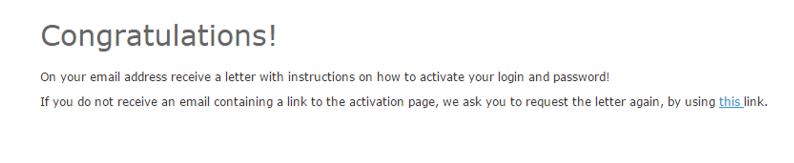
Following that you’ll get a message congratulating you on setting up your account, as well as notifying you to go to your email to confirm it –
Once you get that, head over to your email and you should have received an email from SAPE.
Click on that and translate the page, and you should get something that looks like this below. You then just want to click on the verification link to verify your account –

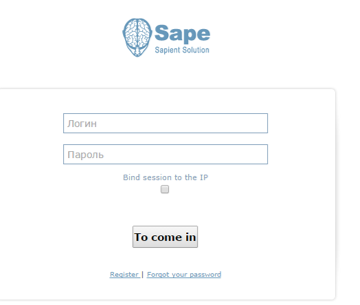
The link will then take you through to this SAPE login page. Just fill out the boxes required with your username and password credentials, and press ‘To Come In’ aka Login –
After that, you’ll be taken through to your SAPE homepage (finally) and this is where the fun really begins –
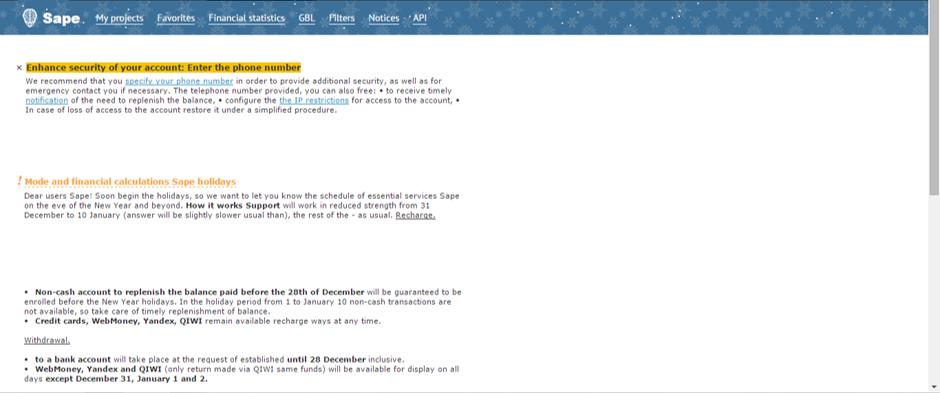
Some of you that haven’t used SAPE for a while or have previously used it may note that the homepage looks a little different. That’s because SAPE changed the design this month… Finally.
Setting up your Billing Information with SAPE
So now that we actually have a verified account with SAPE, the next step is to add your billing information to the site. As I touched on early in the post, the links you purchase from SAPE cost a very small monthly fee to be put on the sites of your choice, and this monthly fee is taken out of a deposit that you set up before purchasing the links. As a result of this, it’s required that you set up your payment method and deposit a small amount of money before actually getting into the process of using SAPE for link purchasing.
Before I show you how to do this, it’s worth me mentioning that due to SAPE being a Russian network its currency is measured in Rubles, so don’t be too worried if you decide to deposit 4200 rubles into your account, as in actual fact 4200 rubles is about $45… Choosing how much you decide to deposit at the start is entirely up to you, however as it will likely be some of your first times using SAPE, I recommend just dropping the rubles equivalent of around $50 into the account at first, and then as you start to see the benefits of the links that you purchase you can increase your balance as much as you’d like over time. You can easily find the exchange rate of rubles to dollars by doing a simple google search, “30 rubles in dollars” should do the trick.
Now that that’s all explained, let’s get into how to go about connecting your payment details to SAPE.
So the first thing you want to do for this step, once you’re signed in to the SAPE homepage and translated the page, is to scroll down and you should see a link that says ‘Optimiser’. Click through to that and it’ll take you through to the optimiser page.
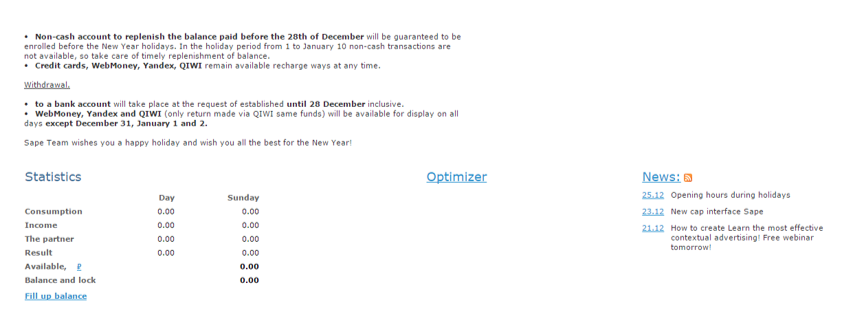
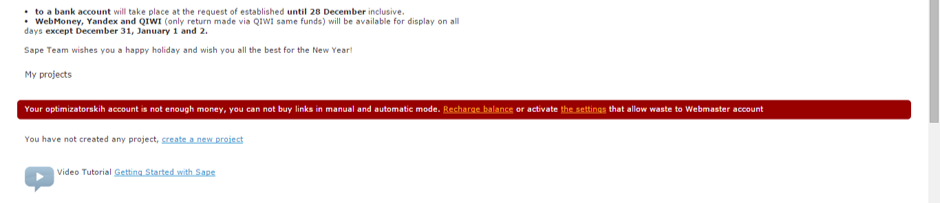
When you’re there, you’ll notice a red alert box that reads: “Your optimizatorskih account is not enough money, you can not buy links in manual and automatic mode. Recharge balance or activate the settings that allow waste to Webmaster account.” What you want to do is click the ‘Recharge Balance’ link on this alert box.
This will take you through to a page that looks like this –

As you can see, there’s a list of the various payment methods that you can choose from. I advise using the credit card method as you’ll find that some of the others are not always available for certain countries, however this is entirely up to you.
You then want to select your chosen payment method (I’ve used the credit card method as the example) and a page will appear like the screenshot below. This step is basically where you decide how many rubles you’d like to initially deposit into your SAPE account. As you can see I’ve entered 3200 rubles which equates to around $43 –

Once you’ve entered in the amount you’d like to add, click ‘create request’, followed by ‘confirmed’.
That will then direct you to this page where you enter in your bank credentials. This area is fairly self-explanatory, however it does give you the option in a tick box to enable payment notifications which is completely up to you. Once you’ve entered in all your details, press ‘proceed’ and then you should be taken through to a page to confirm your deposit.
One thing I will say when setting up this process is that SAPE can be a bit temperamental in terms of confirming your card. When I first connected my payment method to SAPE, it wouldn’t accept the card due to a certain type of error. Don’t panic if this happens though, as a simple 5 minute phone call with my bank quickly rectified the problem, and I then tried again to make a deposit on SAPE and it worked fine.
If for whatever reason it fails to work after , your other option is to contact SAPE themselves by going to the home page of their website and selecting ‘feedback’, then ‘references’, then ‘bank card’. You’d then need to send them a quick message (translated into Russian using google translate) to just explain the situation, however the phone call to your bank should fix it 99% of the time anyway – Western banks, unsurprisingly, find it a bit odd to suddenly be buying rubles from a Russian provider.
So assuming all has gone to plan, you’ll have now successfully deposited your chosen amount of money into SAPE. Now it’s time to set up a project.
Creating a Project
The project or projects that you create are essentially based around the links you want to build to, so for example if you had recently built out 3 parasites that you want to buy SAPE links for, each parasite will have its own unique project. These projects are super easy to set up, and are key to the organisation of your SAPE link building campaigns.
So the first thing you want to do is head back to the SAPE homepage, and once you’re there scroll down and click on the ‘optimizer’ tab again.
When you’re there, scroll down and there will be a small section with a link that reads ‘create a new project’. Click on that link and it’ll take you through to the projects page.
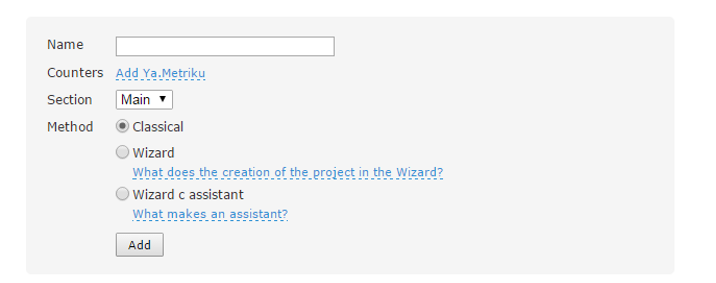
You’ll then have this text box that allows you to add your first SAPE project –

For this step, all you need to do is name your project (I tend to name mine after the website I’m building links to, so for example “example.site.com”). Make sure the section is set as ‘main’ and method is set as ‘classical’ and then press add –
Following that, you will then be taken through to this page –
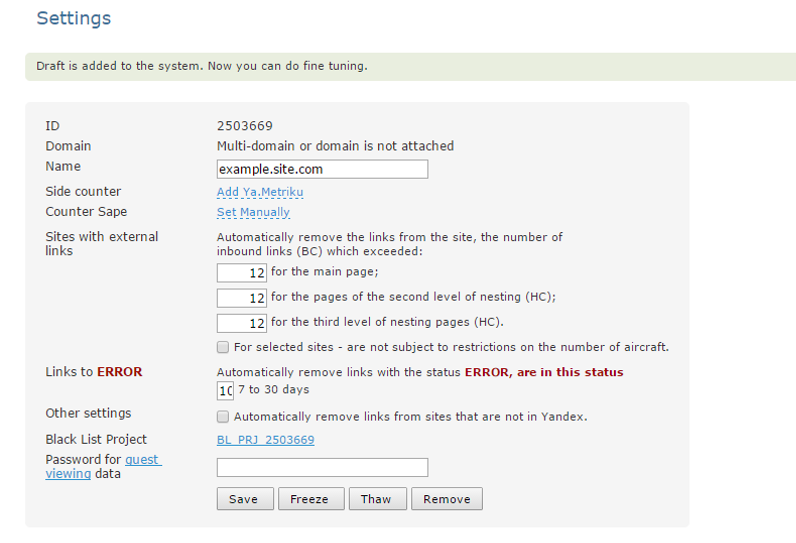
Where you essentially set the rules for the links that you purchase. This section is down to personal preference really, but I’ll show what I typically do for my projects.
So as you can see in the screenshot, you’re able to set a limit for how many external links are on the page with yours, and when this limit is exceeded your link will automatically be removed from the site. This is a useful feature as say for example you find an insanely strong link with only 4 external links on that page, but during that week 10 additional external links are built onto that page, the link to your site will lose a significant amount of link juice from that page and may not be worth the monthly fee you’re paying for any longer. I’d probably recommend setting the external links limit to a maximum of 10-15, however this is completely up to you.
Another filter that can be changed here is the ‘links to error’ filter. This refers to the fact that SAPE links will occasionally not work when first purchased, and as a result will show an error message. This filter enables the link to be automatically deleted after the error message stays for a certain amount of days. You can set the amount of days at anywhere from after 7 days to after 30 days, and I usually set mine to be automatically removed after 10.
Once these settings are added you can leave every other setting as it was and hit ‘save’, your project should now be created.
When the settings are saved, you will be directed to your project page –
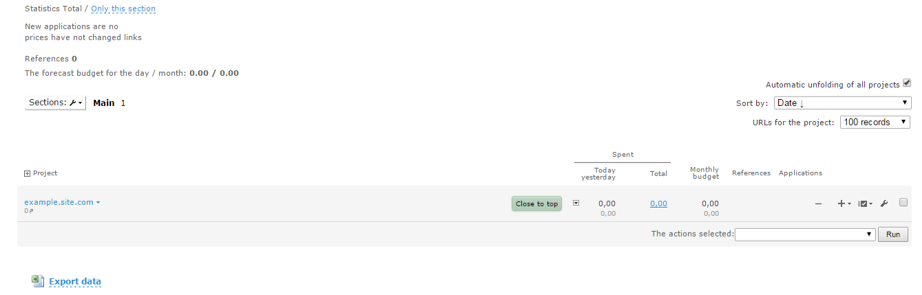
This page is where all your projects will be listed, and any changes you need making to the projects can be made here. For this next step, click through to the small cross just underneath the applications section on the right hand side. When you do that a small drop down list will appear, and when it does select ‘URL’.
When you’ve selected that, it will take you through to a new page. Here is where you need to add the URLs itself and the name of your URL (which I usually just leave the same as the URL itself). You also have the option to add in a keyword which is optional, but again I usually just add in the main keyword I want to target for that site. Here is an example of how I’d fill these fields in –
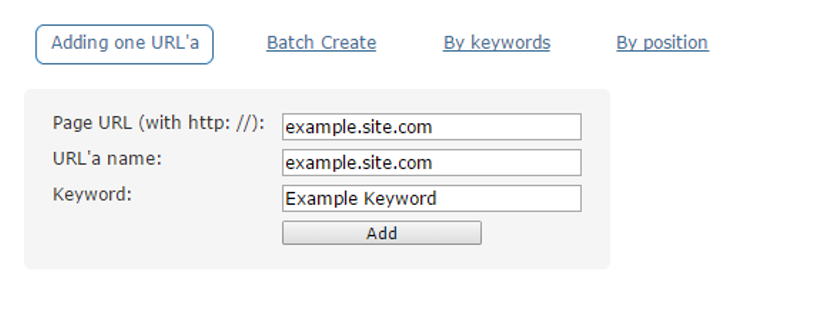 Once you’ve done this, press “add” and then you’ll be taken to the next page. Here, you add all of the anchor text that you want your links to appear as on the links you purchase. For SAPE links, I advise you use keywords that you’d like to rank your money pages with for your anchor texts, however I would suggest you acquire links from other sources with generic and naked URL anchor text in order to ensure link and anchor text diversity for your money page.
Here is an example of how I enter my anchor text into the text box –
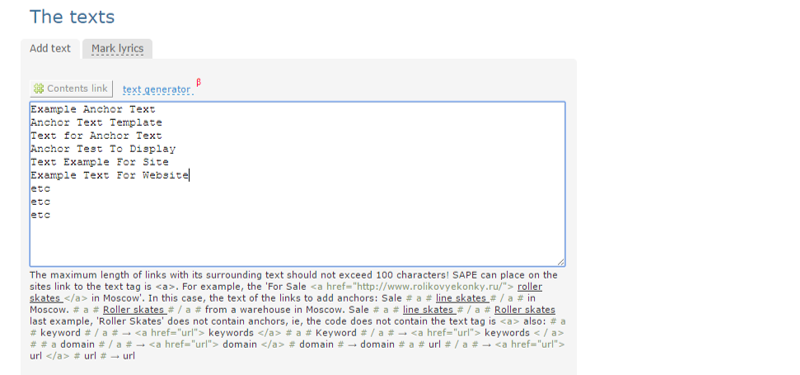
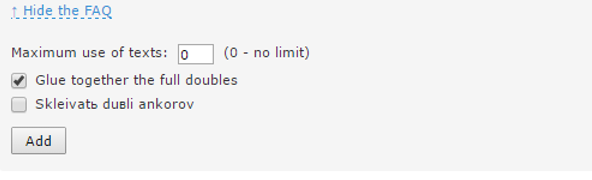
Before you press add and move on to the next step, here’s a few options just above the add button that can be changed if you want to. The ‘maximum number of texts’ option basically means that if you set it to “5” any keyword from your list can not be used more than 5 times for a link. This feature can be handy for those who are building out loads of SAPE links to one project or don’t have an extensive list of keywords for a certain project, however in the past I’ve added a long list of keywords so it hasn’t been something I’ve had to change. Worth making a note about if you start to use SAPE more heavily in the future.
I then just leave the other two options as they were (“glue together the full doubles” ticked and the “Russian option” unticked) and proceed to press ‘add’ –
So now we’re getting somewhere. We’ve fully set up the account, connected our payment method and deposited some money, and we’ve created our first project. Now let’s buy some damn links!
Filtering and Purchasing Links
Ok, so now for the fun stuff, that I actually find quite therapeutic… When it comes to finding super strong sites to get links from, SAPE is up there with the best. What surprised me the most when I first started using SAPE a few years back, was the ease of buying a link. Once you filter what kinds of links you’d like to look for, it’s literally a case of a few clicks and it’s done.
So the first thing you want to do is go back to the home page and click on optimiser (I’m sure you guys are used to doing that by now!). Then once you’re there, click on the magnifying glass on the project you want to build links to, and then this page will appear –
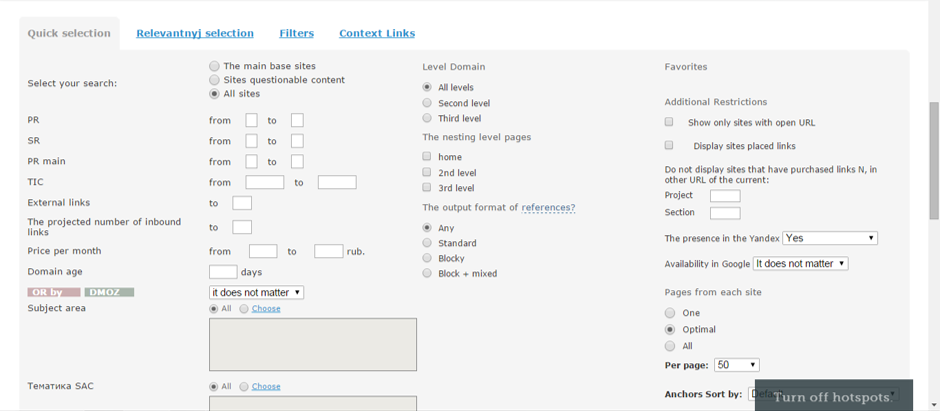
Seems a bit daunting at first glance, but ironically this section is probably the easiest to understand when using SAPE, especially for the more advanced SEOs. So this section is basically where you filter the type of links you want for the site you’re building to. Some of these sections I’ll edit, some I’ll leave blank, again a lot of it comes down to personal preference in terms of what type of link or links you’d like to purchase.
To give you a rough guideline as to what I do for this section, I usually set the PR Main from 3-6. This means that the home page of the site will have a Page Rank of anywhere from 3 to 6. If you’re looking for just home page links as opposed to inner page links, then you’re ok to leave the PR and SR boxes blank, however if you’d like to show results for inner pages within the site, it might be worth just changing the PR box to the metrics you’d like, also.
I then change external links to somewhere between 1 and 10. The external links section just refers to how many external links are on that actual page.
Projected number of inbound links is something I often leave blank, however there’s no harm in changing this to your liking if you feel it’s important to.
The price per month section is measured in rubles, so as a result of this I often put the maximum at around 800, but you can go higher or lower depending on your budget (just to clarify, 800 rubles equates to just under $11 a month).
Domain age I’ll usually change to 180 (which means the domains shown are older than 180 days) again if you feel like altering that to your preference, you can.
Then in the ‘level domain’ section you are able to specify what kinds of pages are shown. In here, select ‘all levels’, but on the ‘nesting level page’ you are able to decide where you want the link to go. If you select ‘the main’, the link will be going on the home page which is the most powerful place for it to go, and if you select 2nd level or 3rd level then the link will be on a page 2 or 3 tiers deep, which is obviously not as powerful but these links are a lot cheaper to buy. Completely up to you but I’d always go with the homepage.
Something important to do also is to make sure that ‘display sites placed links’ in the top right hand corner is unticked, as ticking that option will show sites without the URL, therefore making it impossible to see what the site is and check its metrics, link profiles and the site itself. You can have a play around with the other filters on the site if you’d like to but they’re the main settings you need to change.
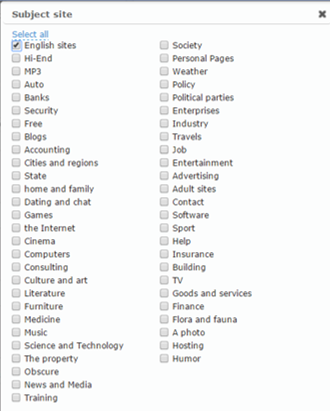
Next you want to scroll down a little bit and press ’Choose’ on the ‘subject area’ section. This will give you the drop down list that you see below. Here you are able to specify what kind of sites you’d like to be filtered. For me, I just select ‘English sites’ right at the top, but you’re able to be a lot more specific than that if you want –
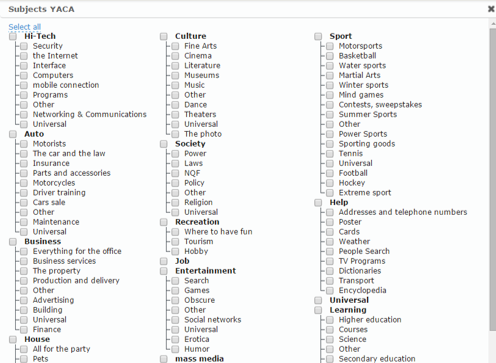
Hit ‘Save’ down at the bottom when you’re happy with what you’ve filtered and then just underneath that, press ‘choose’ on the ‘Тематика SAC’ section. Here you will find a massive list of niches that you can filter for your sites. Again, be as specific or generic as you want, and when you’ve selected the niche/niches you’re looking for press ‘save’ –
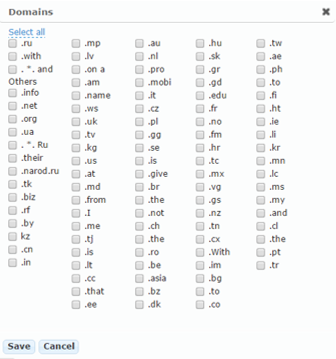
After that, skip past the region box and press ‘choose’ on the ‘domains’ section. There, you can select the relevant TLD extensions that you’d like to filter by. I often go with .uk, .eu, .info, .gov etc. Once you’re happy with your selection, press save again –
After that, leave the keywords section blank as we’ve already entered in our keywords when setting up the project, then just press the ‘find’ button at the bottom of the page to search for your potential links.
You should then get a list of domains from which you’ve filtered. If not and a message appears saying ‘no playgrounds’, simply broaden your search and try again, sometimes making your search too specific can lead to no results being found.
When you do get a list back, you’ll notice the URLs on the left hand site, and the monthly price in rubles for a link on that site on the right –
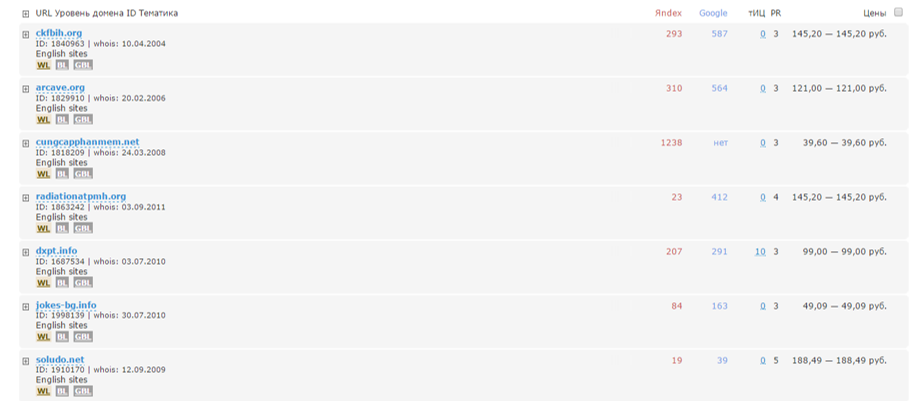
The process for me then is to load these sites into Majestic’s bulk checker or BHC’s bulk majestic checker to fully check the metrics. This can be a little bit hit and miss, but trust me, even with about 10 minutes of searching through these domains you’ll find some real gems. Once I’m really happy with the link and its monthly price, I’ll proceed to buy it.
To purchase a link, what you need to do is click on the small plus on the left hand side of the URL, and a box will appear –

The “/” in the bottom left indicates that it is a home page link (if it said “/article” for example then it would be an inner page link). If you’re happy with where the link is placed on the site, click ‘select text’ in the bottom right and choose your anchor text from the list that appears. When you’ve done that, simply click the small tick box in the bottom right, and to purchase the link scroll down to the bottom of the page and click ‘Buy’ in the bottom right.
You are able to buy links in bulk by selecting multiple links at one time.
Once the link is bought, it should take approximately 1-2 hours to go live, sometimes it happens within a few minutes, sometimes slightly over 2 hours… I keep an Excel document managing all my links, and can easily run the links through ScrapeBox to check if they’re live.
To view your purchased links, simply go back to the homepage, select ‘optimiser’, and then on the project you’ve built links to, there will be a number under the ‘references’ section, click that and it will go through to your links page. Here you can view which links are live, whether there are any errors with your existing links, your current balance etc…
And that’s pretty much all there is to it. The rest of the process simply involves continuing to filter and find relevant, strong and cheap backlinks for your money pages/sites and getting them bought. As I’ve mentioned numerous times in this post, SAPE is amongst the most powerful link building tools available today, and is a perfect platform to help rank pages for some very competitive keywords, at a low price.
If anyone says “but Google go after SAPE” I’ll refer them to this post by me from 2013.
Thanks For Reading
I hope you enjoyed this post, and have a great 2016.
Drop your SAPE success stories, questions and what you’d like to see next in the comment section below.. and don’t forget to join my email newsletter for more updates.